
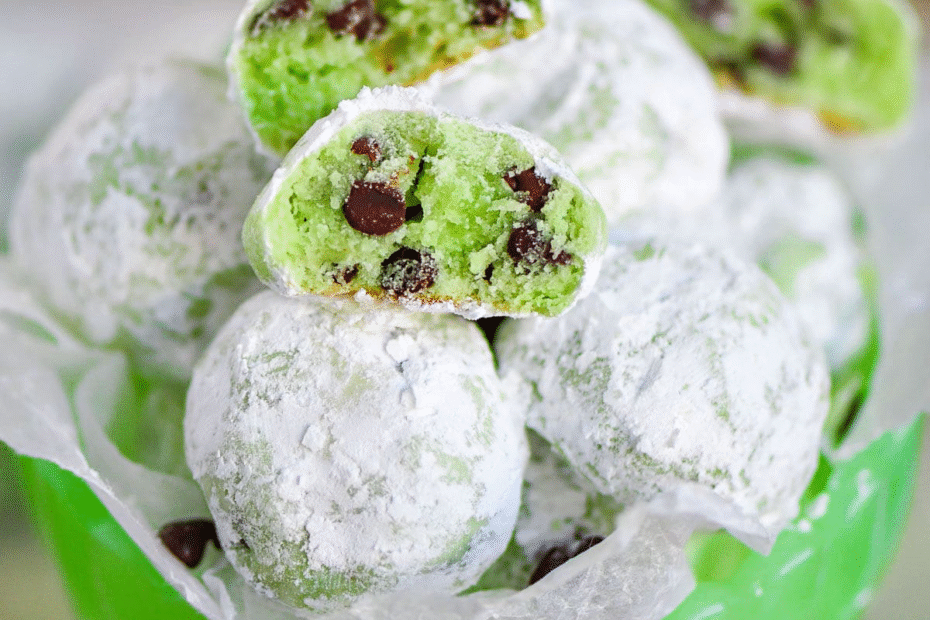
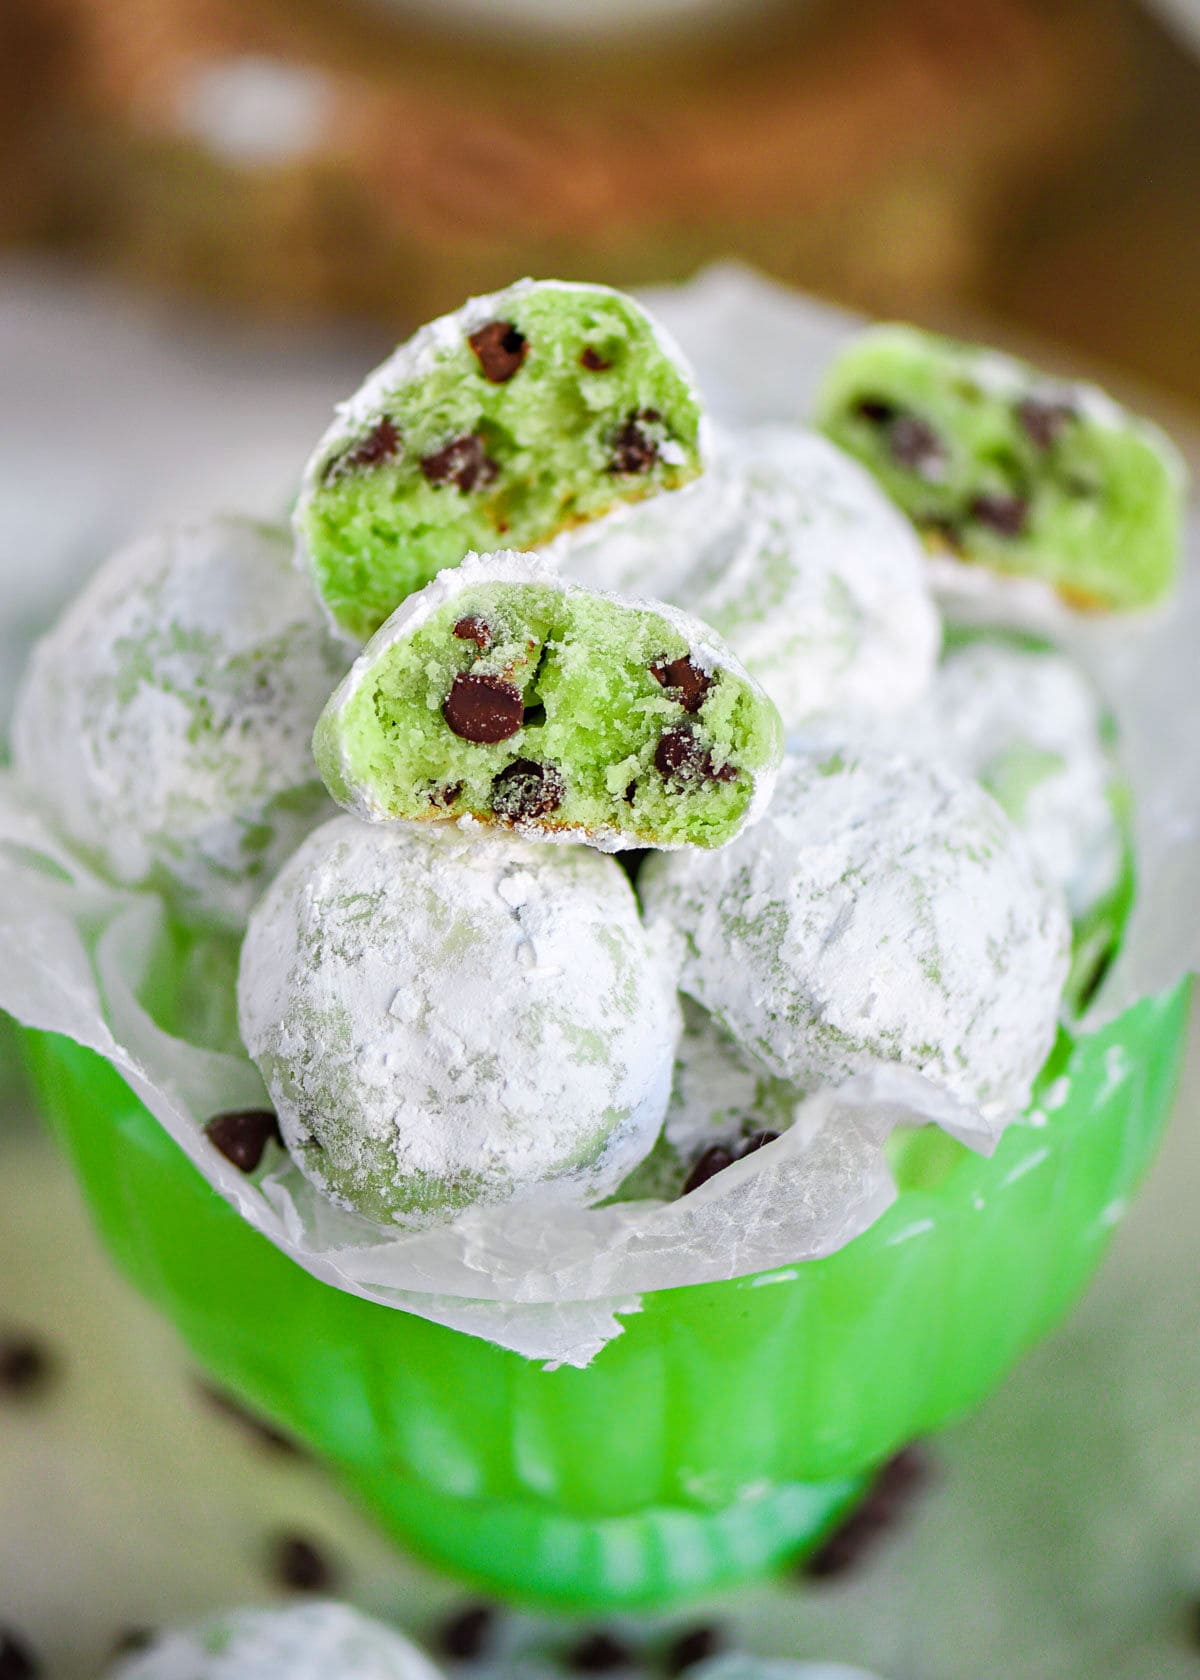
These melt-in-your-mouth Mint Chocolate Chip Snowball Cookies are buttery, minty, sweet, and dusted in powdered sugar for the perfect snowball look. With mini chocolate chips and a refreshing hint of mint, these cookies are festive, delicious, and perfect for Christmas cookie platters, gifting, or winter-themed desserts.
Soft, crumbly, adorable — a holiday must-bake! 🎄✨
💚 Why You’ll Love These Cookies
- ❄️ Snowball perfection — soft, buttery, and coated in powdered sugar.
- 🍃 Refreshing mint flavor balanced with chocolate chips.
- 🍪 Easy, no-fuss dough — no eggs, no complicated steps.
- 🎄 Festive & gift-friendly — perfect for cookie boxes and holiday parties.
- 🧊 Freezer-friendly — bake ahead or freeze the dough!
mint-chocolate-chip-snowball-cookies
Ingredients
Equipment
Method
- Line a baking sheet with parchment paper.
- Beat softened butter and powdered sugar until light and fluffy.
- Add flour, salt, and mint extract; mix until just combined.
- Add green food coloring if desired; mix.
- Fold in the mini chocolate chips.
- Roll tablespoon-sized portions into balls and place on the tray.
- Chill dough balls for 30 minutes.
- Preheat oven to 375°F (190°C).
- Bake 7–8 minutes, until bottoms are lightly golden.
- Cool 5 minutes, then roll lightly in powdered sugar.
- Once fully cooled, roll again in powdered sugar for a thick coating.
Notes
• Double coat the cookies in powdered sugar for true “snowball” look.
• Add nuts or dip in melted chocolate for variations.
🍪 Ingredients (≈ 30 cookies)
- 1 cup unsalted butter, softened
- ⅔ cup powdered sugar, sifted
- 2 ¼ cups all-purpose flour, spooned & leveled
- ½ teaspoon salt
- 1 teaspoon mint extract (or peppermint extract)
- A few drops green gel food coloring (optional)
- ¾ cup mini chocolate chips
- Additional powdered sugar — for coating
👩🍳 Instructions
- Line a baking sheet with parchment paper — set aside.
- In a large bowl, beat the softened butter and powdered sugar until light and fluffy.
- Add flour, salt, and mint extract; mix until combined.
- Add green gel coloring (optional) and mix until evenly tinted.
- Fold in the mini chocolate chips.
- Scoop tablespoon-sized portions and roll into balls. Place on the baking sheet.
- Chill dough balls in the refrigerator for 30 minutes to help them keep shape.
- Preheat oven to 375°F (190°C).
- Bake for 7–8 minutes, until bottoms are barely golden.
- Cool for 5 minutes on the sheet.
- Dust a second tray generously with powdered sugar.
- Place slightly warm cookies onto the sugar tray and dust the tops.
- Once completely cool, roll each cookie in a bowl of powdered sugar for a full snowball coating.
🧊 Storage & Freezing
- Room temperature: Store in an airtight container for up to 4 days.
- Freeze baked cookies: Freeze in a sealed container for up to 2 months.
- Freeze dough: Shape dough balls and freeze up to 2 months. Bake from frozen — just add 1 extra minute.
✨ Tips & Variations
- Add ½ cup chopped nuts (pecans or walnuts) for extra crunch.
- Swap mint extract for peppermint for a stronger flavor.
- Dip half the cookie in melted chocolate for a gourmet touch.
- Make “Grinch Snowballs” 👀 by tinting the dough bright green.
- Roll in peppermint sugar for extra holiday flavor.
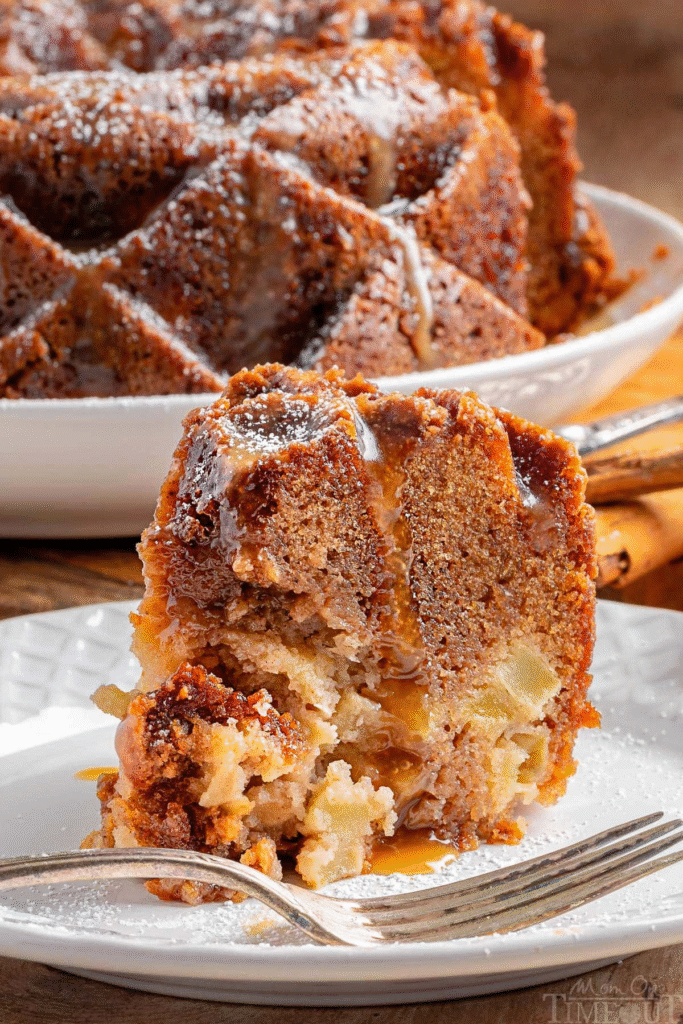
Warm apple cake with autumn spices and buttery caramel topping.
Why You’ll Love It This cake brings together tender chunks of apple, cozy fall spices,…
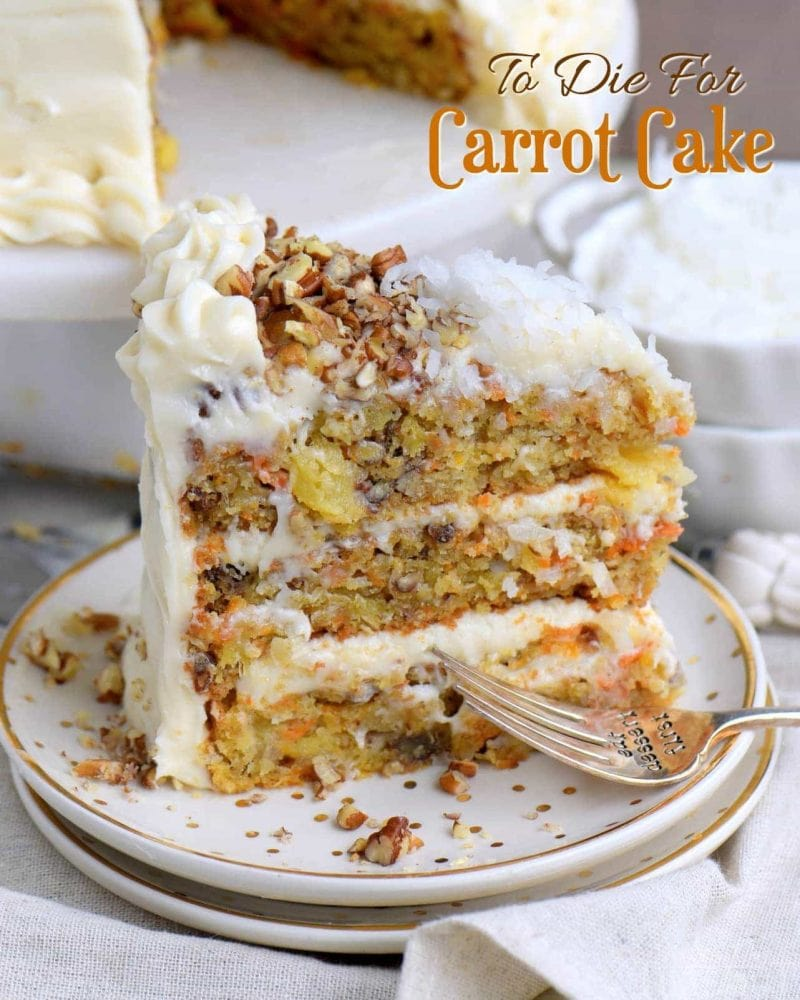
To-Die-For Carrot Cake — Moist, Flavorful & Perfect for Any Celebration
Why You’ll Love This Cake This carrot cake is incredibly moist and packed with flavor…
Hot Chocolate Cupcakes — Cozy, Marshmallow-Topped Cupcakes
Why You’ll Love Them 🏡 They transform the comforting warmth of hot cocoa into a…

Better Than Anything Toffee — Buttery, Chocolate-Topped & Perfect for Gifts or Snacks
Why You’ll Love It 🥜 Simple but irresistible: only a few basic ingredients — butter,…

Limoncello Cake — Bright, Moist & Irresistibly Zesty
Why You’ll Love This Cake A tender, lemon-scented cake that’s moist yet light — perfect…

No-Bake Pumpkin Cheesecake — Creamy, Spiced & Holiday-Ready
Why You’ll Love It 🥧 Super easy and quick: only ~10 minutes of hands-on time…